
It is often assumed that because the stars only come out at night, taking photographs of them must be difficult and require very specialised and expensive equipment. In fact this is not the case and with advances in technology even relatively ordinary cameras can produce images that only a decade or two ago would have required much more complex gear.
Firstly, we need to understand that a photograph is produced by exposing a light sensitive medium to a certain amount of light for a certain amount of time. In that past that medium was film, and it was relatively insensitive to light, and also the decision as to how sensitive was made at the time of purchase. The biggest single change in photography in recent years is that sensors are now digital, they are considerably more sensitive, and that sensitivity is adjustable.
This gives us many opportunities when photographing the Night Sky. We’ll consider a few examples of actual photos taken by the author. To start at a simple place we’ll assume that you have a camera with at least some adjustment of Aperture, Shutter Speed and Sensitivity (ISO). Most high end compacts and pretty much all Bridge Cameras, Compact System Cameras and Digital SLRs will have these controls.
The main accessory that you may not already have is a reasonably sturdy tripod. The length of exposures used in night time photography is such that hand-holding cameras is impractical. When an exposure can be several seconds long then good support is essential. A cable release is also handy as this allows the shutter to be pressed without risk of moving the camera, though the self-timer can also be used for this f your camera has no remote socket. A refinement on the cable release is an Intervalometer – this is a timer that takes control of the camera and can be set up to take many exposures over a period of time.
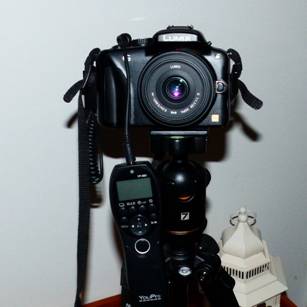
This setup can be used to take single shot exposures of several seconds, or even tens of seconds, and also can take a sequence of many images over a period of time. This is very useful as we’ll see.
Focussing
Getting the focus right is crucial to getting good pictures and is made more difficult by the fact that Autofocus doesn’t work in the dark. The standard trick is switch to manual after having set the focus using distant lights, or, if it is available, The Moon. In practice any source of light more than a mile or so away is far enough to bring the Night Sky into focus.
The Earth’s Rotation
It might be assumed that because the Earth takes almost 24 hours to rotate, we don’t need to worry about this with camera exposures of only a few seconds. And we’d be wrong – the effects of the Earth’s movements become very apparent quite quickly. There is a rule of thumb called 600/f which defines the longest exposure that can be taken with a lens of a focal length (35mm equivalent) of f. So with example of the commonly used 50mm lens the longest possible exposure without star trailing is 600/50 = 12 seconds! A telescope may have a focal length of 1200mm so there the maximum exposure would be 0.5 sec. The solution to this is to attach everything to an Equatorial Mount and this is more or less essential for any photography involving a telescope.
Mounting to a telescope
Many telescopes have a custom mount which enables a camera to be fitted to them via an intermediate adaptor called a T-mount.
Processing on your PC
Camera images taken at night will generally benefit from some additional processing. Photoshop in its various editions is the standard tool for the job but there are also free tools such as Paint.net and Gimp which do a similar job. There are also specialised tools such as Deep Sky Stacker (adds together lots of images to reduce noise), Startrails.de (stacks images taken over a period of time to mimic a much longer exposure) and others.
Example 1 – The “Supermoon”
Although this phenomena has been somewhat over-hyped in the press, it has been helpful in raising interest in astronomy and to that extent it has been a good thing. In fact the Full Moon is only slightly larger than usual at this time and there are three of them every year, so not all that rare. The Full Moon is not the most photogenic of Moons either – I would suggest the earlier phases such as the First Quarter would make a nicer photo. The Moon is a small subject, but it is very bright in astronomical terms, being the second brightest object in the sky after The Sun. It is small however and getting surface detail requires a lot of magnification. Without using a telescope, a camera with a long telephoto lens, such as a Bridge Camera, is best for this.
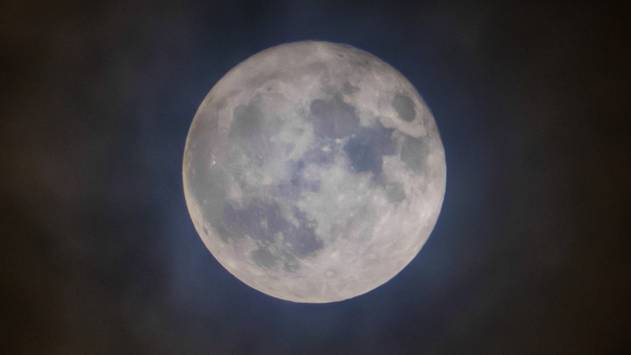
This image was taken with a Lumix FZ200 Superzoom camera on a tripod. The Moon was taken through thin cloud which has formed a “Lunar Corona” around the Moon – the blue inner circle and the rust coloured outer circle. Settings were as follows – Focal Length – 600mm equivalent, Shutter Speed 1/80th, aperture f2.8, ISO 100. The colour saturation was increased subtly in Photoshop Elements revealing that the Moon does indeed have different coloured areas corresponding to different minerals on the surface.
Example 2 – Aurora Borealis
The Northern Lights, or Aurora Borealis, are generally thought of as being an Arctic Circle phenomena, but actually when the circumstances are right they can be seen as far south as Northern Ireland. Some displays can be very bright with red, green and purple colours visible to the naked eye. More often though only the green is visible to the eye with other colours appearing as a white fog because the display is not bright enough to activate the colour sensors in the eye which are less sensitive than the luminance receptors. The camera will show a different view entirely and this is called a “Photographic Aurora” for that reason.

The setup here involves having the camera on a tripod. The displays are large so a wide-angle lens is best, but it’s also faint so long shutter speeds and high ISO will be used.
This was taken with a Lumix G3 mirrorless camera with a 20mm (40mm equivalent) f1.7 lens – 10 secs f1.7 ISO 1250. Had I been using a Compact camera or a Bridge camera I would have used a longer shutter speed and lower ISO as the small sensors in these cameras tend to be noisier. Since aurora displays move, sometimes quite quickly, shorter exposures capture more detail and this is one area where an expensive full-frame camera has an advantage.
Example 3 – Planetary Conjunctions

This is a rare example where, because the subjects were quite bright, it was possible to use a small telescope on a simple tripod – no motors required. This happens occasionally – because the Solar System is fairly flat sometime objects pass each other in the sky. The sunlit part of the Crescent Moon is overexposed here, but the Earthshine – the rest of the Moon lit by light reflected from the Earth has exposed well and as well as Jupiter we see the four Galilean moons. Telescope was a 80mm f7.5 refractor (f=600mm), camera was a Sony DSLR, exposure 0.5sec ISO800.
Example 4 – Constellation or Starfield
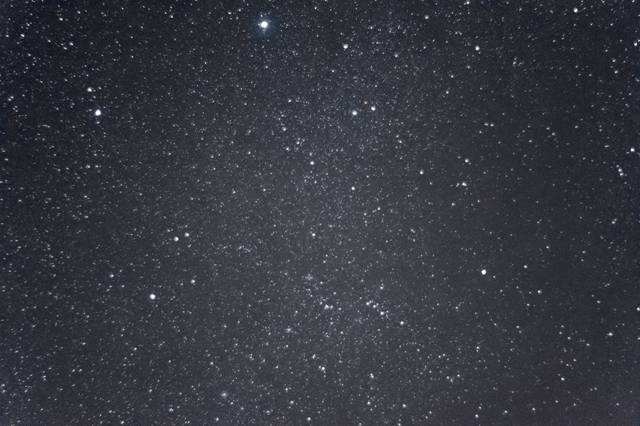
This is a widefield area of the sky – in this case the constellation of Auriga the Charioteer. Auriga is dominated by the bright star Capella aa the top of this image and there are many many stars visible here, far more than could be seen with the naked eye. There are even three Messier Objects visible, and yet no motors were used here, this is just a DSLR camera with a 50mm f1.7 lens mounted on a static tripod. Settings were 10secs, f1.7, ISO 3200.
Example 5 – Startrails with Aurora Borealis
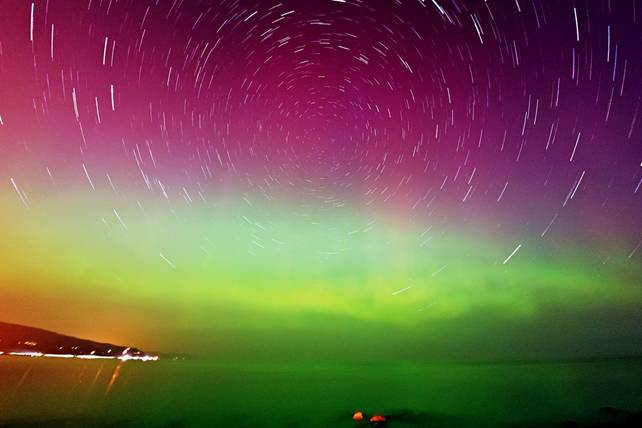
This one uses a combination of techniques. The original photos were taken over a period of 20 minutes – there were 50 of them each 20 secs long, all taken with a mirrorless camera with 7.5mm fisheye lens on a tripod. The original intention was to create an animation showing the motion of the aurora and this was done as well, but as an experiment the images were fed into Startrails.de software which is designed to stack a number of images together to create startrails as we see. The end part of the processing used a piece of software called PTLens which straightens out fisheye images.
Example 6 – the Milky Way
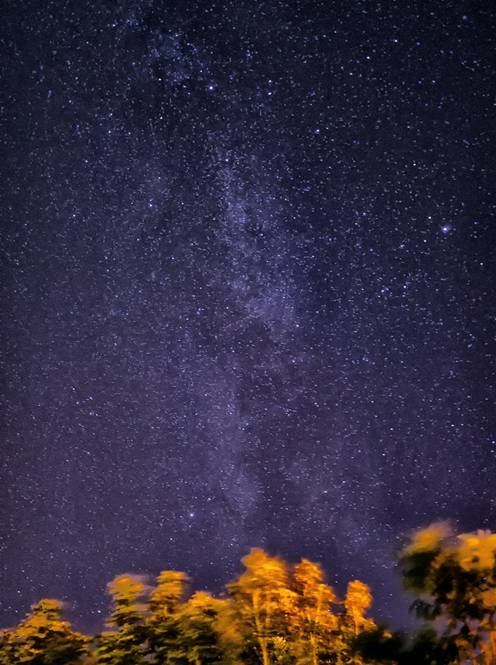
Being a faint diffuse object, the most important thing with getting a good Milky Way image is to find a good dark sky site. Fortunately Northern Ireland has many good locations such as The Antrim Hills, The Sperrins and the North Coast from which it is possible to get good images. A wide angle lens with a wide aperture is best, and a fairly long exposure. The setup here was a Lumix G3 mirrorless camera with 14mm lens (28mm equiv), 30sec f2.5 ISO 1250, undriven tripod mount.
That’s all, happy shooting!